I’m dealing with a bit of a “self-inflicted” wound on the Cybertruck. I’ve had a few run-ins with curbs in the past (sorry to Abby’s Model X wheels!), but this latest incident happened while heading out to CES 2026.
I’m sharing this experience because it highlights exactly how durable—and surprisingly affordable—Cybertruck repairs can be when you’re dealing with the exterior trim and plastic hardware. Let’s break down what happened, how Tesla Mobile Service handled it, and exactly what it cost me to fix my mistake.
The Incident: High Curbs and Plastic Flares
While meeting up with my buddy Eric at the Barstow Rivian Adventure Network, I got a little too excited. I hopped a curb that was much higher than I anticipated. Now, the Cybertruck is a beast—it took the hit like a champ, and luckily the fat tires protected the wheels from any rash.
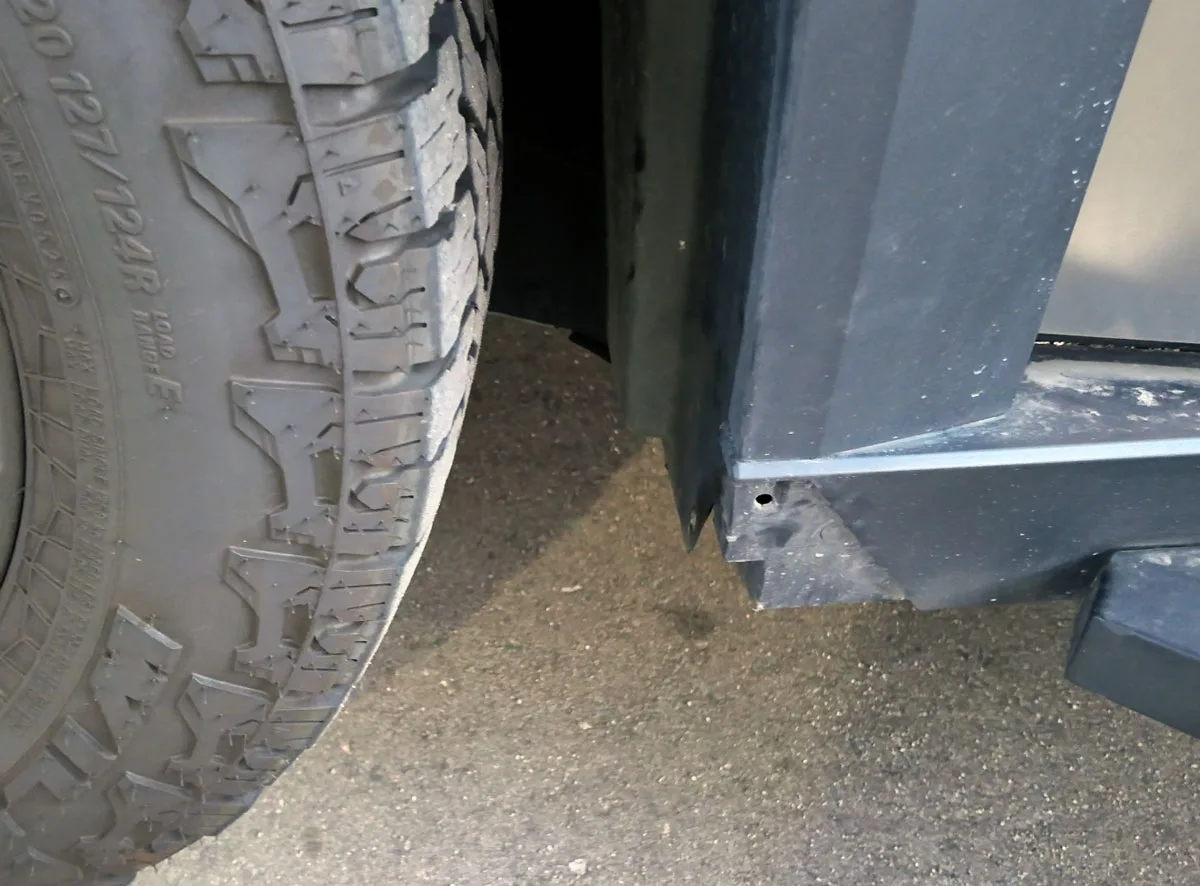
However, the passenger-side rear flare and the front mud flap weren’t so lucky. The high curb caught the plastic trim, bending it and snapping several of the mounting pins. It was dangling so badly that Eric and I had to perform some “field surgery” and rip it off so it wouldn’t become a projectile on the highway to Vegas.
The Repair Ticket: Mobile Service vs. Service Center
I initially requested a service center appointment, but Tesla reviewed the photos and determined this was a perfect job for Mobile Service.
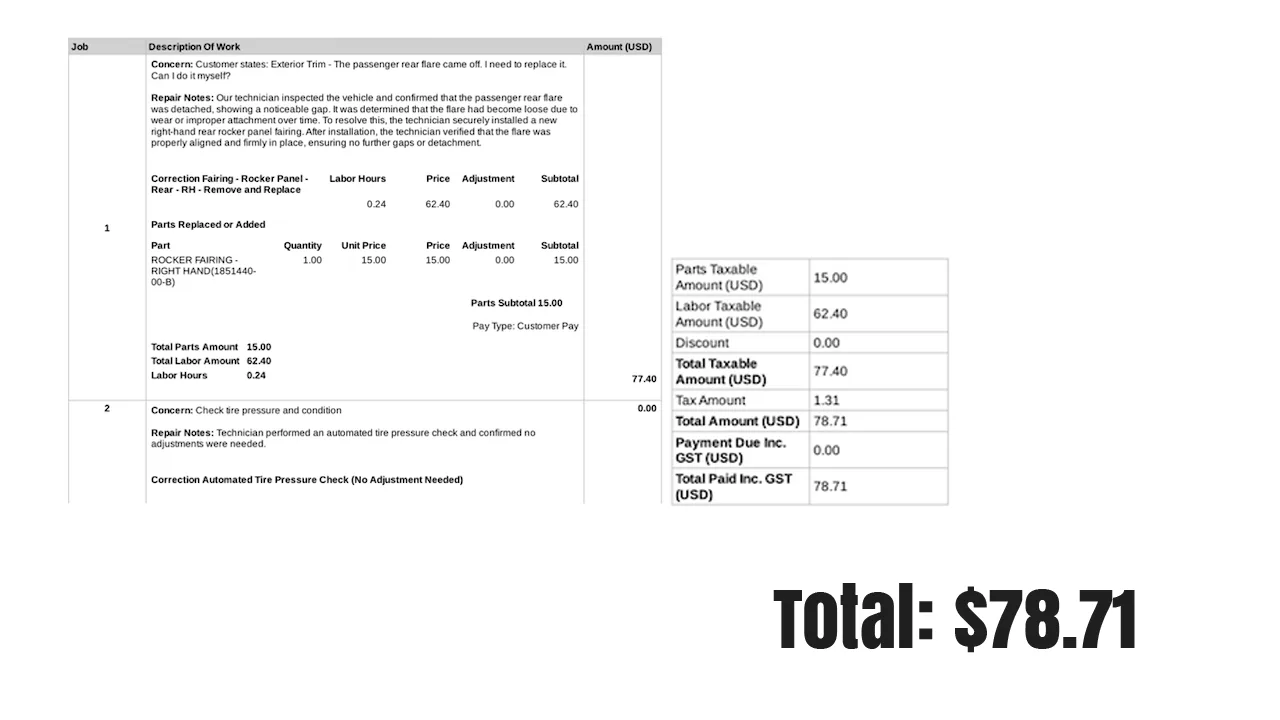
- The Parts: I needed a brand-new rear wheel arch/flare and a fresh set of mounting pins and clips.
- The DIY Question: I asked if I could just buy the parts and install them myself for a tutorial video. Tesla didn’t bite—they insisted on a service appointment.
The Service Experience: Justin and the “Buyback” Cybertruck
A huge shoutout to Justin, the Tesla Mobile Service technician. He rolled up in a wrapped Cybertruck (which, interestingly, was a buyback vehicle that Tesla kept the aftermarket wrap on!).
I thought this would be a 10-minute “snap-on” job. I was wrong. To properly replace that rear flare, Justin had to:
- Remove the Aftermarket Running Boards: Since the flare tucks behind the running board mounting area, they had to come off first.
- Clear the Mud Flaps: The front mud flap also had to be removed to access all the hidden screws.
- Fish Out Broken Hardware: There were two screws—one deep inside the trim and one underneath—that were inaccessible without these steps.
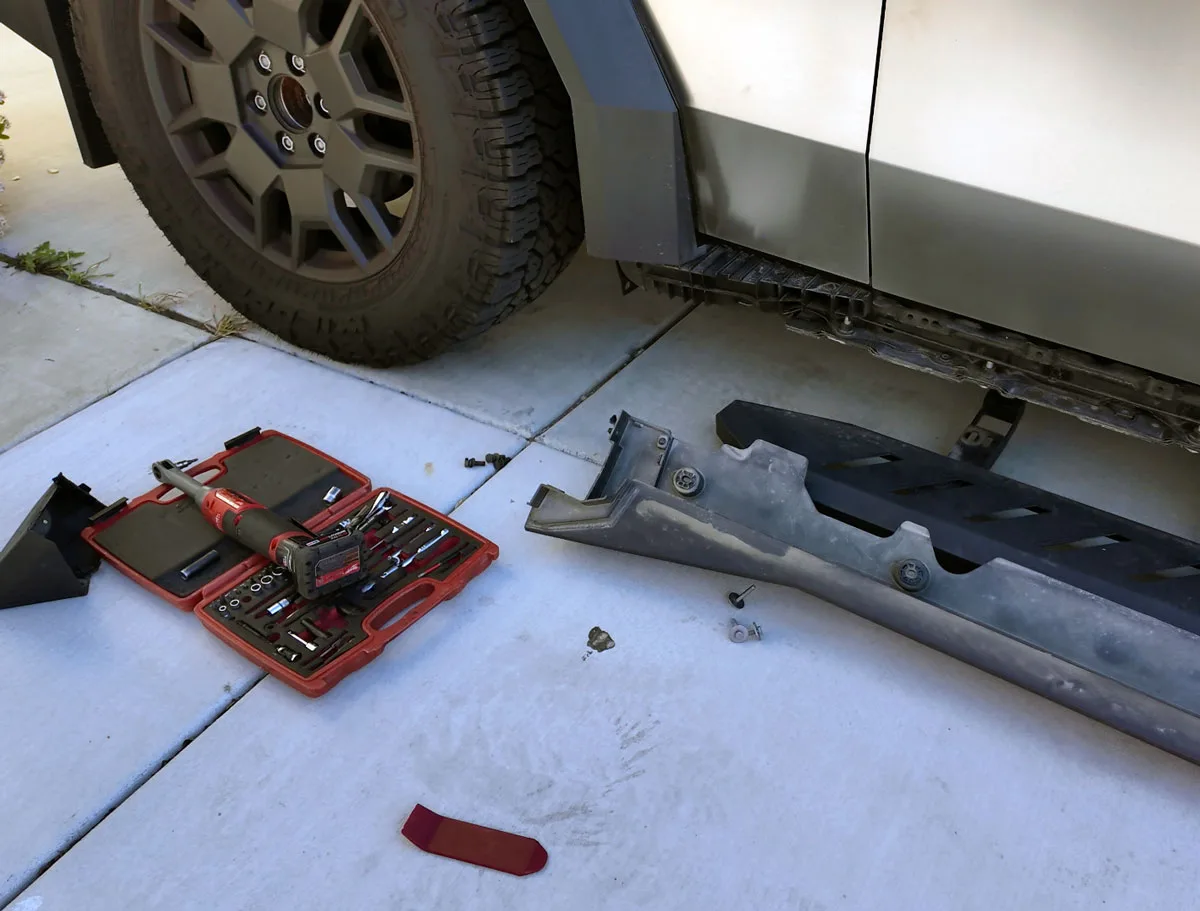
Despite the extra labor involved in dealing with my aftermarket accessories, Justin didn’t charge any additional fees. The total job took about 40 to 45 minutes.
The Cost Breakdown (Parts & Labor)
You might expect a “Cybertruck Tax” for parts, but since many of these plastic components are locally sourced and high-volume, the cost was surprisingly reasonable.
The Best Part? Thanks to everyone who has used my Tesla Referral Code, I was able to use my referral credits to cover the entire cost. You guys literally paid for my bad driving—thank you!
Final Thoughts & Lessons Learned
- Curb Awareness: Even with the high ground clearance, those plastic flares sit low enough to catch high curbs. Use your cameras!
- Aftermarket Mods: If your aftermarket accessories (like running boards) interfere with a repair, Tesla can charge you extra labor. I got lucky this time, but keep that in mind when modding.
- Mobile Service is King: For trim issues, skip the service center. Having a tech come to your driveway is a massive time-saver.
| Item | Cost (Estimated) |
| Rear Wheel Arch Flare (Part) | Included in Total |
| Mounting Pins & Clips | Included in Total |
| Labor (Mobile Service) | Included in Total |
| TOTAL OUT-OF-POCKET | ~$80.00 |