This page may contain affiliate links. If you click on one and make a purchase, I may receive a small commission at no extra cost to you. This product was provided to me free of charge for review. While I appreciate the opportunity, my review reflects my honest experience. The company has no input or editorial control over this content.
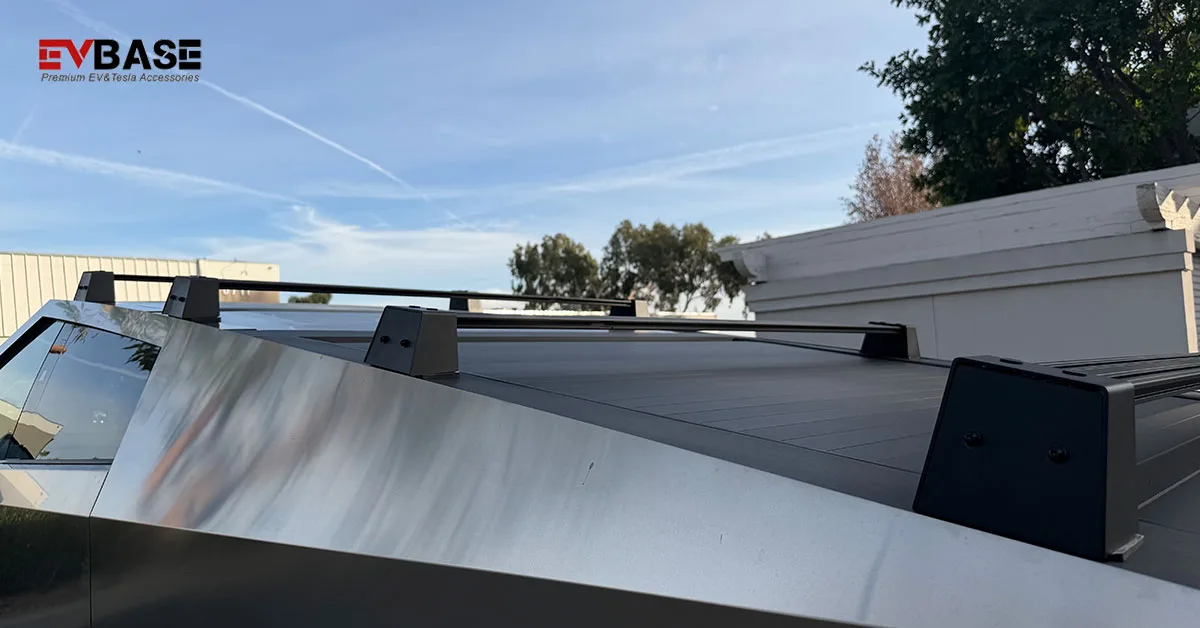
Is this the best Cybertruck roof rack? I’m leveling up the Cybertruck with a major hardware addition. I’ve been saying I need to get my Cybertruck accessory game on point, and thanks to the team at EVBase, we’re starting with something big: Cybertruck Crossbars.
Whether you’re looking to mount a bike, a Starlink dish, or extra gear for a desert trek, a solid roof rack is essential. Tesla offers their own version for a steep $800, but EVBase has sent me their full 4-bar kit to see if it’s a viable (and much more affordable) alternative.
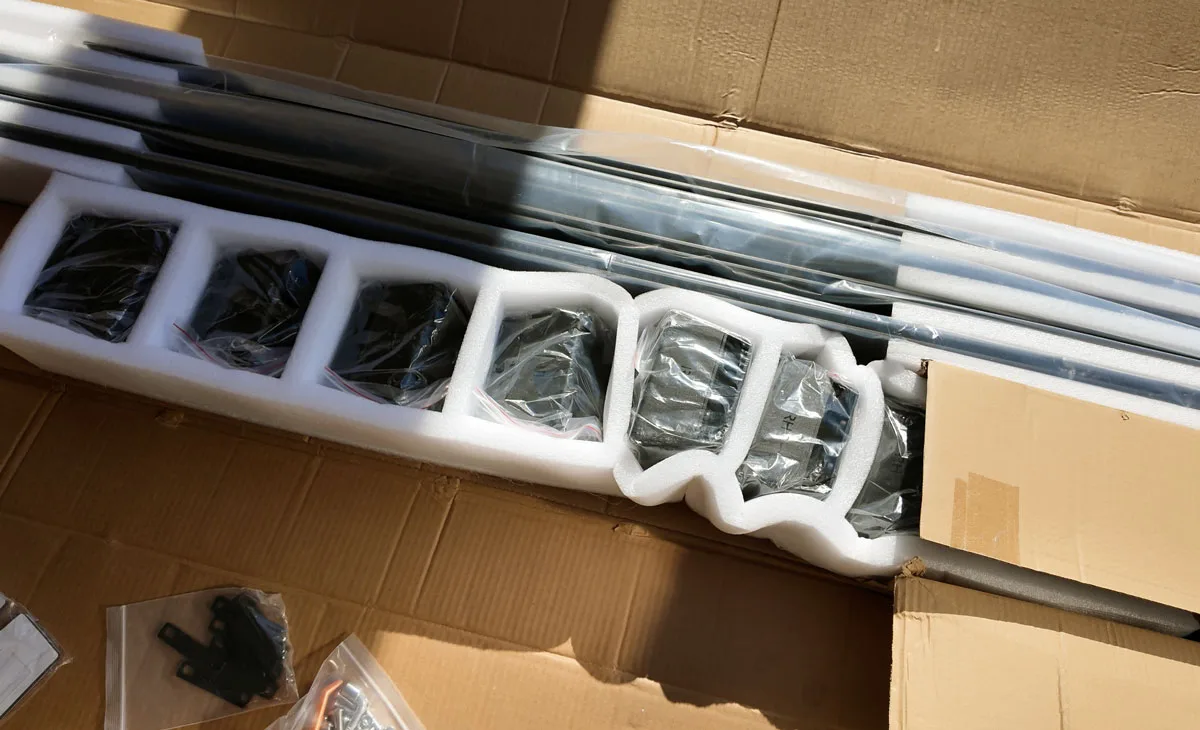
The Hardware: EVBase 4-Piece Cybertruck Roof Rack
Right out of the box, the quality is impressive. The kit includes:
- Four Crossbars: Numbered 1 through 4, as they are specific lengths to fit the tapering width of the Cybertruck.
- Side Supports: Labeled for Left Hand (LH) and Right Hand (RH) positions.
- Mounting Hardware: Bolts, screws, and even a pry tool for the Cybertruck’s plastic trim.
- Protective Pads: Optional double-sided adhesive pads to prevent metal-on-plastic scratching.
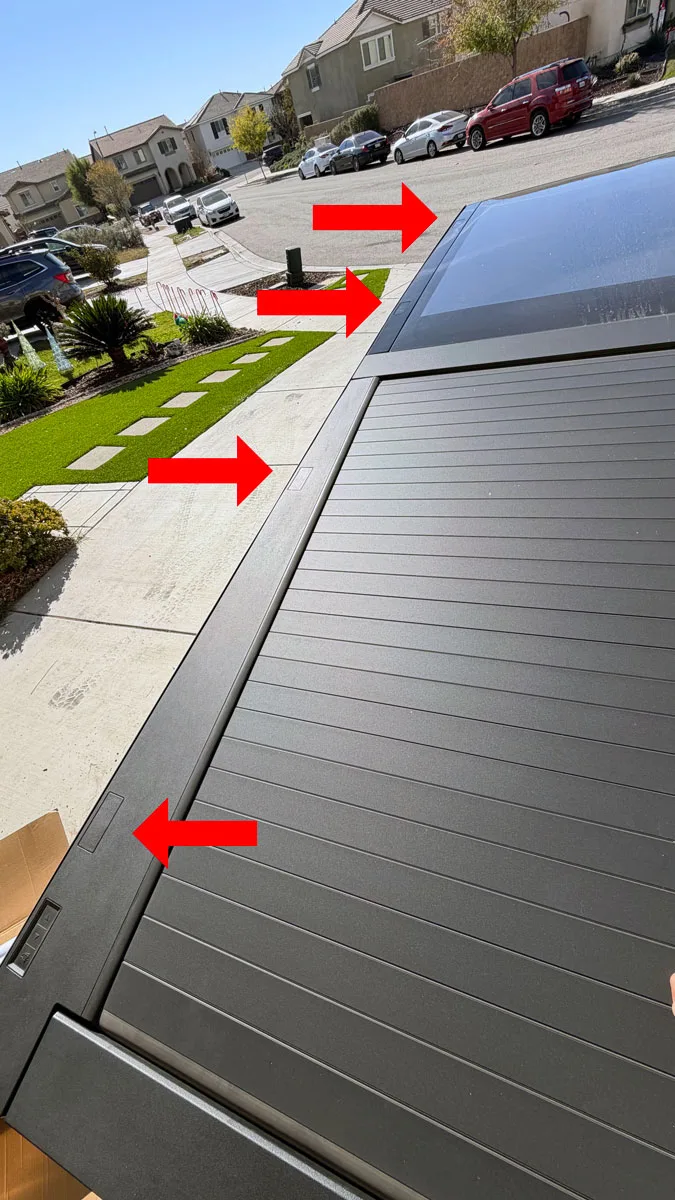
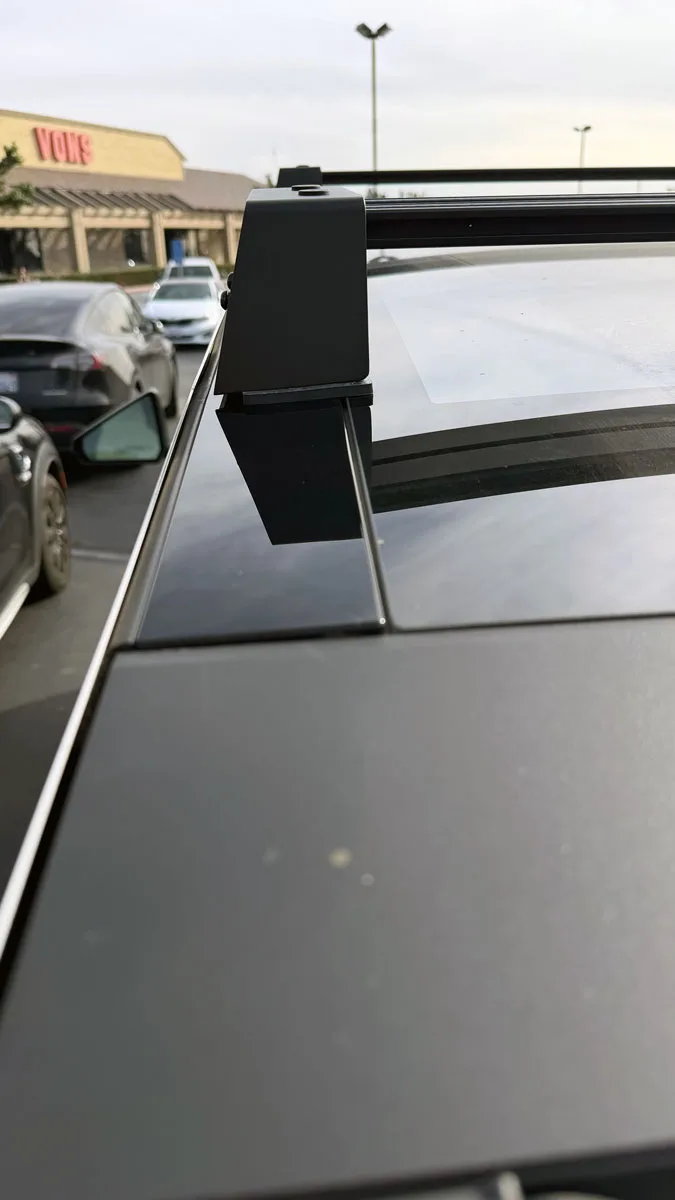
The Cybertruck Mounting Points
The Cybertruck has four distinct mounting locations:
- Position 1: Furthest forward, above the front cabin glass.
- Position 2: Slightly behind the first, still over the cabin.
- Position 3: Above the front of the truck bed (the vault).
- Position 4: Furthest back, near the tailgate.
The Installation Process: Tips & Warnings
Installing these is relatively straightforward, but there are a few “gotchas” that could save you a massive headache.
- CRITICAL WARNING: Be extremely careful not to drop the mounting bolts into the truck’s body panels. There is a small gap where a bolt can fall and become a permanent “rattle” unless you remove the entire plastic shroud. I actually had to use a magnetized screwdriver to fish one out!
- The Cabin Mounts: Positions 1 and 2 overlap slightly with the edge of the glass roof. While the pressure is primarily on the metal trim, my previous experience with a Rivian R1T cracking a glass roof makes me extra cautious. From what I can see, there is no direct pressure on the glass, but it’s something to monitor.
- Wiring Harnesses: On the passenger side near Position 1, there is a wire harness for the overhead lights. Just make sure to tuck it out of the way before tightening the bracket.
Real-World Testing: Noise and Efficiency
I’ve had these installed for several weeks, through rainstorms and high-wind conditions.
- Road Noise: I didn’t notice any significant increase in wind noise or “whistling” at highway speeds. My Falken Wild Peak all-terrain tires already provide a baseline of road noise, and the rack didn’t seem to add to it.
- Utility: I ended up keeping only Position 3 and 4 installed for daily use. Why? Because Position 4 (near the tailgate) can actually get in the way if you need to hop into the bed to reach gear deep in the vault. Position 2 and 3 seem to be the “sweet spot” for most users.
- Efficiency: Any roof modification will take a small hit on your Wh/mile, but in my testing, the impact was subtle. The bigger hit to efficiency usually comes from driving speed and wind conditions rather than the bars themselves.
Final Verdict
If you need more than two crossbars, or if you simply want to save hundreds of dollars, the EVBase Cybertruck Roof Rack is a fantastic choice. It’s sturdy, easy to install (if you’re careful with those bolts!), and gives the truck a much more rugged, functional look.
I’ll be testing these further with my bike rack and a custom Starlink mount soon, so stay tuned for those updates.
EVBase referral – https://my.linkpod.site/evbase
20% off using code: sherwin
Product Link – https://www.evbase.com/s8z9rq