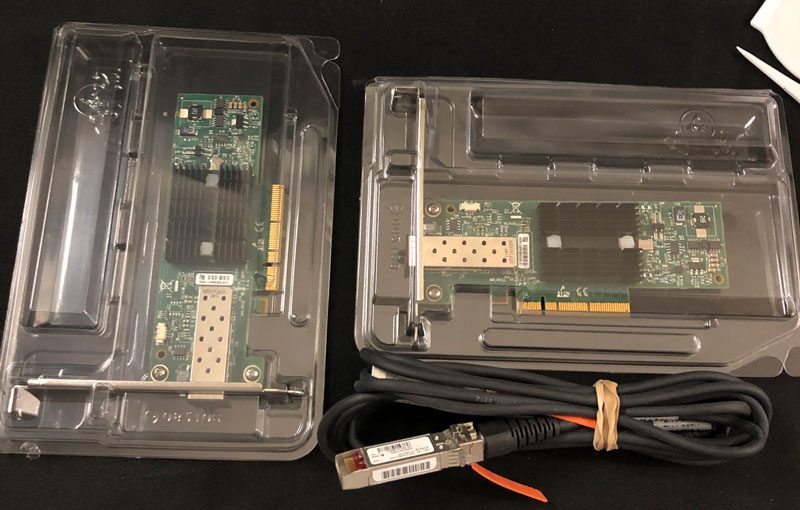
I recently picked up a pair of Mellanox MNPA19-XTR 10GB Ethernet cards from eBay for a really good price. I wanted a faster way to do back ups. Currently, I have a Synology DS1815+ as my main storage server. It has 8x 4TB configured as a RAID6. This will give me up to two drives to fail with a third destroying the RAID itself.
Next I’m using my old X79 PC running Freenas. It has 8x 2TB configured in RAIDZ (RAID5). I know, with that many drives I should run at least a RAIDZ2. But the purpose of this is a back up the Synology server.
Now I wanted another back up because I don’t want to lose any data plus it’s fun to play with these things. I decided to pick up 3X 8TB drives and will configure them as a software RAID5 on Windows 10.
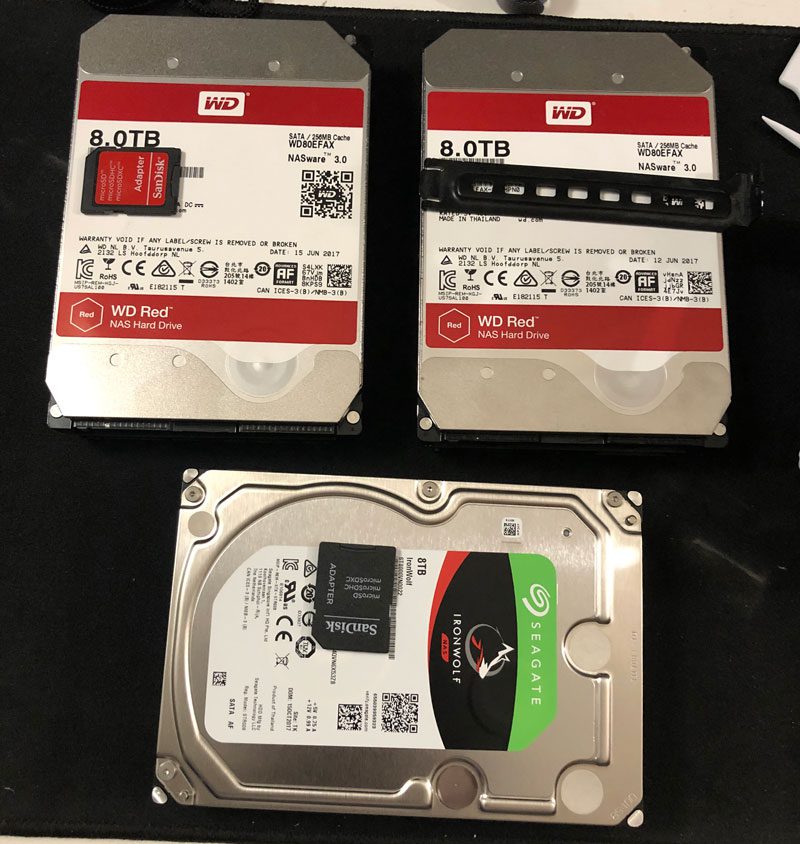
This was also good time to dust off my X99 PC in the Fractal Design Node 804. This case has grown into me. I really like this case. The design of this case is great. The filters work great and adding these 3 hard drives was easy. The only issue I had was with the Seagate drive where only two of the four holes lined up.
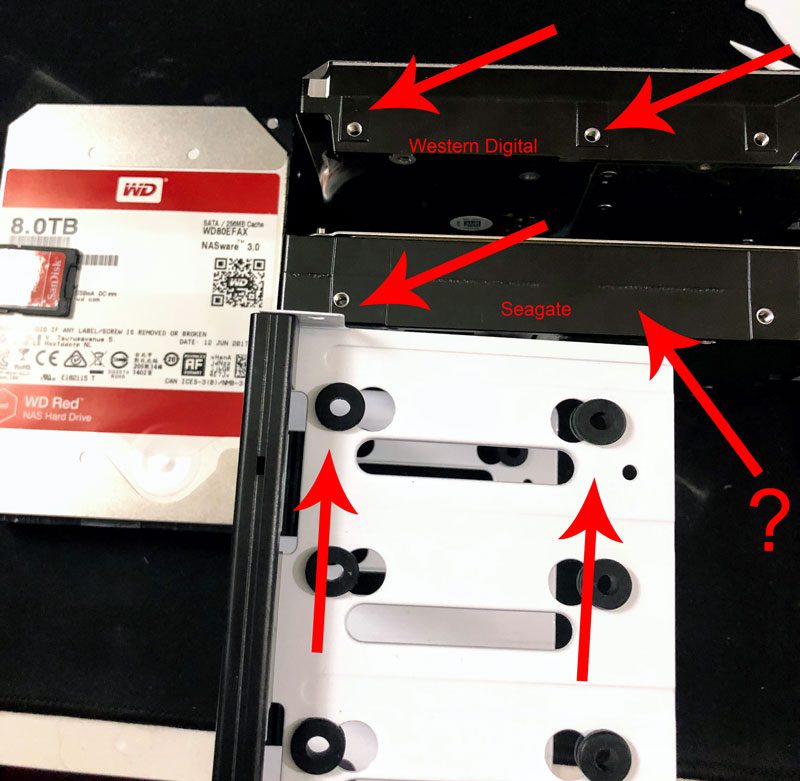
The Seagate drive swings back and forth but not a big deal since the computer just sits in its place.
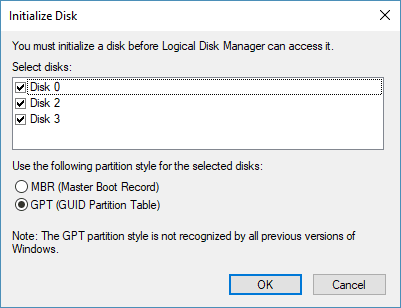
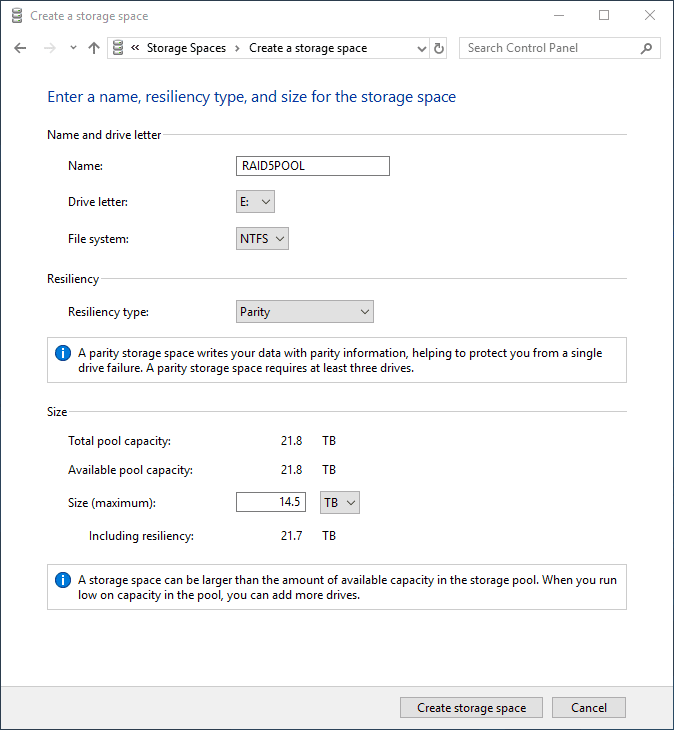
When initializing the drives, make sure you select GPT if the drives are over 2TB each. Otherwise, it will resize them to more than 1 partition each disk.
Next I will use Storage Spaces to create a RAID5 pool.
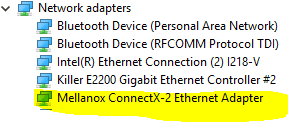
Now on to the Mellanox card. Windows 10 has identified it automatically without any driver install.
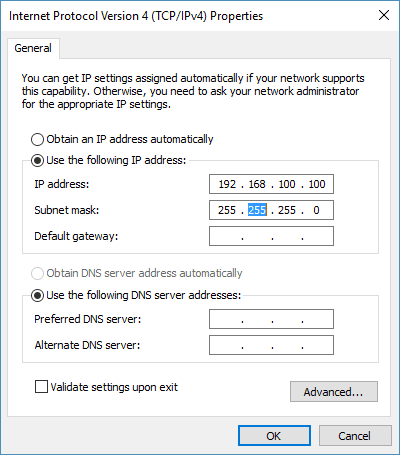
Next I will give the Mellanox card a static IP using 192.168.100.100.
In Freenas, go Network then Add Interface. On the NIC dropdown, you should see a new adapter – select it and fill out the information. I will use 192.168.100.101 with the same subnet mask.
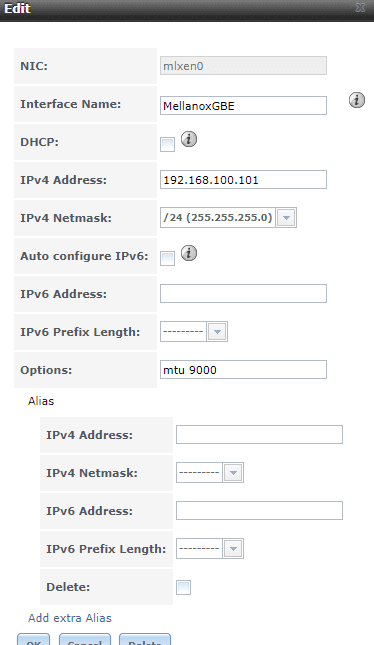
When setting the IP address to the Mellanox, the IP saved on the first NIC either changed or became inaccessible. So I set the static IP on that as well and all went back to normal.
I created a test file on Windows that’s 10GB big using
fsutil file createnew test10gb.txt 10000000000
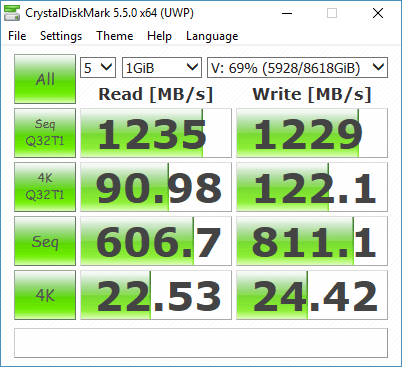
I wanted to see how fast I can copy the file from my desktop to both the storage pool and a shared folder on Freenas using the 10GB connection. Here are the results.
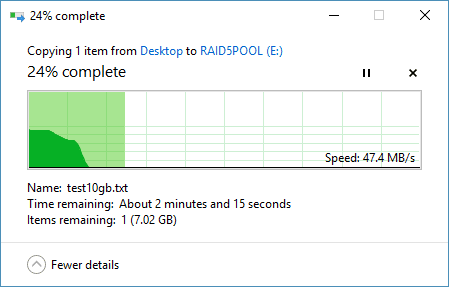
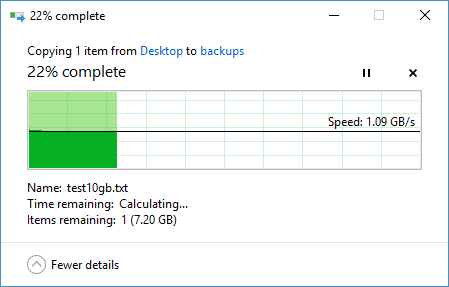
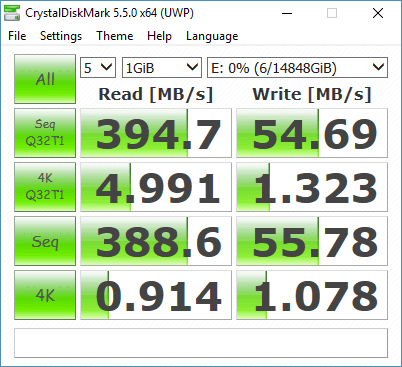
The storage pool transfer is a bit slow but not surprising. The speed to the shared Freenas folder was as expected. I ran CrystalDiskMark on both and here are the results that support the speeds above.
Overall, this has been a good addition. The cards are around $32 for two and the cables were only $12 – SFP-H10GB-CU3M Cisco SFP DAC cable. So for less than $50 I can connect to Freenas using 10GB ethernet. I will be using Robocopy and running back ups.
Make sure you pull out the cables using the color tabs. They are locked in place and the tabs will release them.


4 Responses
I’m really glad that I found this post.
I’m extremely in need of some help, and oddly you have almost the exact same setup that I’m running. Please bear in mind I’m a hobbyist and this is my first time messing with server grade hardware.
My specs are:
FreeNAS Server:
CUDA
FreeNAS 11.2
P9x79-pro
I7 3820
40gb ddr3
3x intel 1gb NIC w/ LACP configured
1x Mellanox MNPA19-XTR
2x Seagate Barracuda 4TB
Soft tube watercooled
Main PC:
ENiGMA
Win 10 PRO
Strix z370-e
I5 8600k OC @5.0Ghz
16gb ddr4
1x Mellanox MNPA19-XTR
Evga Gtx1080 SC
1x intel black NVME 256gb boot drive
1x Samsung evo 860 500gb program drive
2x Seagate Barracuda storage drives
Custom copper tube watercooled
I have the Freenas server configured with two separate subnets, one is for lagg0 (192.168.0.x) and one is for the Mellanox (10. 0.0.1), with an SMB share bonded to both IPs. The two PC’s are connected via a procurve 1810g-24 for the 1gb nics, and have a direct connection via a passive DAC cable (Cisco brand, 3m).
I am using the default driver that freenas loaded, and Mellanox 5.35 driver for windows 10.
Everything is set up and working properly, but file transfer speeds are not what I expected. Over a 1gb network I was transferring a test folder with large (+5gb each) files at 110-115mb consistent, but with the mellanox adapters I’m only able to achieve 170-180mb with the same folder. I was expecting closer to 1gb transfer speed. I’ve tried adjusting the receive buffer on the win10 machine from 512 to 4096 as per another article but there was no change.
Also, on the main pc the nvme is plugged into A1 so the 2nd pcei slot is getting 8x which is what’s needed by the mellanox.
I bought the adapters (kit) from china if that helps at all lol. Although I have to say for used hardware I was impressed that they came in sealed static bags.
hi tom, i’m also a hobbyist and not really an expert on server hardware. i just like playing with toys. are you sure you are connect through the mellanox network? one of my mellanox actually failed (on my Windows 10 but freenas card still works). i didn’t even notice until i checked the network performance. since the network between the mellanox card failed, Windows 10 shifted the traffic over to my gigabit network. i mounted the freenas via domain and share name. so it was something like \\freenas\my_shared_folder. the connection still works but rather than connecting between the mellanox cards, it’s using my gigabit network instead.
i would try to force the connection to the mellanox card. so something like \\10.0.0.1\the_shared_folder. now also keep in mind that transferring a single 10GB file versus transferring a folder with a total of 10GB (made up of hundreds of small files) can give different results.
those are my initial guesses. hope that works for you. now i have to figure out if my card truly is broken or cables.
Far as I can tell no matter what I try I only get 1GB out of Freenas even with all 10GB cards so I must be missing something
When you say GB, I’m assuming you mean gigabyte. So 1 byte = 8 bits. If you’re getting a transfer speed of 1GB per second that’s 8Gb per second that’s close enough to the performance of a 10Gb (small b as in bits) network card. You won’t get the full 10Gb speed because there are some network overhead. Also, let’s say you have a folder with a bunch of small files that equal 5GB (let’s call it folder_a) and a single 5GB file called file_a.zip, the zip file will transfer quicker than a folder_a.